How to Calculate Slope for a Single-Direction Curbless Shower
How to calculate slope for a single-direction curbless shower: A single-direction curbless shower slope usually uses 1/4 inch per foot . To calculate the…
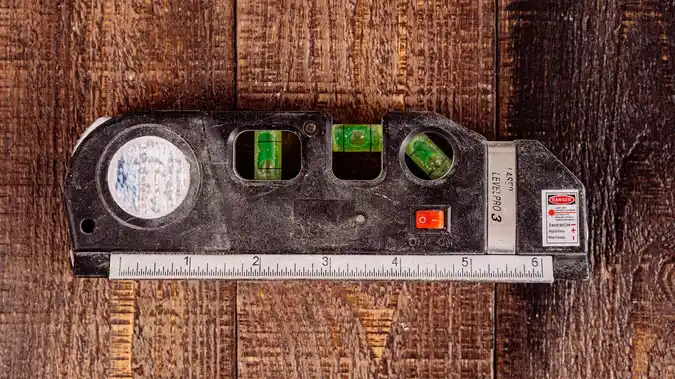
bubble level and ruler on wood
Last updated: November 12, 2026
Quick Answer: A single-direction curbless shower slope usually uses 1/4 inch per foot. To calculate the slope for a single-direction curbless shower, multiply the run in feet by 0.25 to get the total fall in inches. The steps below show the math, where the drain placement changes the answer, and how to avoid a floor that ponds water.
What “single-direction slope” means in a curbless shower
The phrase how to calculate slope for a single-direction curbless shower means finding a one-plane floor that falls from the high edge to the drain. Picture this: you’re standing at the dry bathroom floor and looking into the shower area, and the whole wet zone pitches in one direction toward a linear drain. That is a single-plane shower slope, and it is the cleanest math in curbless work.
The idea is simple. Measure the run from the highest point of the shower floor to the drain line, then multiply by the slope you need. For most shower floors, the common rule is 1/4 inch per foot of fall. A 4-foot run calls for 1 inch of drop. A 3-foot run calls for 3/4 inch. That is the whole job in one line.
The catch is that a curbless shower starts at zero threshold at the entry, so the floor has to give you enough depth without making the bathroom floor feel like a ramp. If the drain sits too far from the entrance, the drop grows fast. If it sits too close, water has a longer trip and the low point gets crowded.
Key Takeaways
- Single-direction slope means one steady pitch, not a bowl shape.
- The basic math is run × slope = drop.
- The common shower rule is 1/4 inch per foot.
- Drain location changes the required depth more than people expect.
- A laser level and screed sticks make the layout easier to trust.
How do you calculate fall for a linear shower drain?

You calculate it by measuring the run from the farthest point of the shower floor to the drain and multiplying that distance by the slope rate. A linear drain usually makes this easier because the floor can pitch in one direction only.
Start with the distance in feet. Then use the 1/4 inch per foot rule as the slope rate. If the run is 5 feet, the fall is 1.25 inches. If the run is 3.5 feet, the fall is 7/8 inch. Keep the units straight, and the math stays simple.
Many people measure wall to wall and miss the actual high point. The high point is not always the shower wall. In a curbless layout, it is often the point where the wet-area floor meets the dry floor or the top edge of the bonding flange assembly.
- Measure the full run from the high point to the drain centerline or drain edge, depending on the drain type.
- Multiply that run by 1/4 inch per foot.
- Convert the result to inches and fractions you can mark on the slab or subfloor.
- Check that the finished tile thickness still leaves enough depth for the slope.
- Mark the high line and low line before any mortar goes in.
A linear drain near the entry often shortens the run and reduces the drop. A linear drain at the back wall increases the run and usually needs more build-up at the far edge. That is why drain choice and slope math belong in the same conversation.
The rise-and-run formula for a single-plane shower floor
The rise-and-run formula is drop = run × slope, and for a curbless shower the slope is usually 1/4 inch per foot. That gives you the total vertical difference between the high side and the drain side.
Use this formula in any format you like, as long as the units match:
- Drop in inches = run in feet × 0.25
- Drop in inches = run in inches ÷ 48
- Slope = rise ÷ run
That last form is handy if you already know the fall and want to check whether the floor is steep enough. A 1-inch fall over 4 feet is 1/4 inch per foot. A 1-inch fall over 6 feet is too shallow for a standard shower pitch.
You can sketch the section on paper in under 5 minutes. Put the high point on one side, the drain on the other, and write the measured run above the line. Then multiply by 0.25. If the result looks awkward, the layout may need a drain move, not a steeper floor.
Use a laser level if the room has a long span or a floor that is already out of level. A straight board and tape measure work for short runs, but a laser shows the real height line across the whole shower footprint. That matters when the bathroom framing is older than the tile plan.
How to use a laser level and screed sticks

A laser level gives you the height line, and screed sticks give you the surface line you need to hit. That pairing keeps the floor from drifting off the math by the time the mortar is packed.
You’ve already marked the drain and the high edge, and now you need a clean guide for the slope. A rotary or line laser projects a level line around the room, and you subtract the planned drop from that line at the high side. That gives you a reference for setting the mortar bed.
Use screed sticks or guide rails to hold the mortar to the planned plane. If the shower needs 1 inch of total fall, one edge of the sticks sits 1 inch above the drain-side height at the far side of the shower. If the run needs 3/4 inch of fall, the sticks follow that exact difference. The mortar then gets pulled flush to the sticks.
A simple sequence helps:
- Set the laser to the finished height reference.
- Mark the drain height.
- Mark the high-side height by adding the calculated fall.
- Place the screed sticks to those marks.
- Pack and strike the mortar to the sticks.
Do not trust the tile alone to create the slope. Tile follows the base. If the base is flat, the finished shower will be flat. If the base waves, the water will find the low spots and sit there.
Common math mistakes that ruin the pitch
The biggest mistake is measuring the wrong run, and it usually costs a rework. If you measure wall to wall instead of high point to drain, the floor can end up too flat or too steep by a visible amount.
Another common error is mixing inches and feet in the same step. A 48-inch run is 4 feet. Multiply 4 by 1/4 inch per foot, not 48 by 1/4. That mistake turns a simple shower into a broken floor plan.
A third mistake is forgetting the finished tile thickness. A mortar bed, waterproofing layer, and tile all take space. If you calculate slope from the structural deck without accounting for finish build-up, the drain can end up proud or the entry can end up too tall. That is a bad day for a curbless entry.
Use this checklist before you mix anything:
- Measure the actual run from the high point.
- Confirm the slope rate is 1/4 inch per foot unless your system calls for something else.
- Convert all numbers to the same unit.
- Add finish thickness into the section detail.
- Recheck the drain height against the surrounding floor.
The slope can be mathematically right and still feel wrong if the transition to the bathroom floor is too abrupt. A curbless shower is part math, part section detail. If the surrounding floor cannot absorb the drop, the layout needs a rethink.
Can you use 1/8 inch slope for a curbless shower?
Yes, a design might use 1/8 inch per foot in special conditions, but that is not the default rule for a standard shower floor. The common benchmark remains 1/4 inch per foot for reliable drainage.
This is where the job stops being a simple formula and becomes a system question. Some shower assemblies, drain locations, tile sizes, and waterproofing methods can support a gentler pitch. A large-format tile surface or a low-profile assembly may still need enough fall to keep water moving, and that depends on the full drain design, not just the tile face.
A shallower pitch can help keep the floor feel flatter underfoot. The trade-off is slower drainage and a higher risk of standing water if the floor is not dead-on flat within the plane. On a curbless shower, that can mean water tracks toward the room instead of the drain.
If you are using a shower system, the manufacturer’s slope requirement wins. If the system calls for a specific pitch or bed depth, follow that detail rather than guessing from the tile alone. For general shower design guidance, the Tile Council of North America’s handbook and the shower receptor details from ANSI standards are the places professionals check first.
A worked example for a single-slope curbless shower
A 4-foot run needs 1 inch of fall at 1/4 inch per foot, and that is the kind of number that lets you set the whole floor in one pass. The example below shows the math without any hidden steps.
The drain is at one end of the shower and the far side of the floor is 4 feet away. You measure from the highest point of the wet area to the drain line. The run is 4 feet. Multiply by 0.25. The result is 1.0 inch.
Now mark the high side and the drain side:
- High side: finished floor reference
- Drain side: 1 inch lower over the full run
- Midpoint: 1/2 inch lower over 2 feet
That midpoint check matters because it shows whether the pitch is steady. If the middle does not split the difference, the floor is not really single-plane. It may still drain, but it will not read cleanly under a straightedge.
If the run changes to 5 feet, the fall becomes 1.25 inches. If the run shrinks to 3 feet, the fall drops to 3/4 inch. The formula stays the same. Only the run changes.
For a deeper reference, the shower slope and drainage rules in the Tile Council of North America handbook are the right companion to this page, and the same detail belongs in the broader curbless shower slope and drainage hub.
What this calculation does not solve
The slope calculation tells you the pitch, but it does not solve floor flatness, drain choice, or waterproofing transitions. Those are separate jobs, and each one can break drainage if ignored.
A single-plane shower floor still needs a base that is true enough to follow the line. If the subfloor dips 3/8 inch in the wrong spot, the finished slope can shift even when the math was perfect. That is why a laser level and a dry layout matter before mortar day.
It also does not decide whether your drain belongs near the back wall, near the entry, or in the middle of the run. That choice changes the slope math. A back-wall linear drain usually lets the shower floor pitch in one direction with a clean section. A centered drain may call for a different geometry.
The calculation is the starting point. The build detail is the finish.
How do you calculate fall for a linear shower drain?
You calculate fall by multiplying the drain run by the slope rate, usually 1/4 inch per foot. If the shower floor runs 4 feet from the high side to the drain, the fall is 1 inch.
The drain’s location decides the run. A linear drain near one end shortens the run; a drain farther away increases it. Measure from the highest point of the floor, not from the wall by habit, or the result will be off.
Can you do 1/8 inch slope for curbless shower?
You can in some systems, but 1/4 inch per foot is the safer standard to check against first. A gentler pitch may work only if the drain assembly, waterproofing, and tile layout are made for it.
The trade-off is slower water movement. On a curbless shower, that can leave water sitting on the floor if the base is not very flat. Check the manufacturer’s detail and the shower standards before you commit to a shallower pitch.
Drafted with AI; not yet reviewed by a person.



4 thoughts on “How to Calculate Slope for a Single-Direction Curbless Shower”