Curbless Shower Subfloor Preparation — The Complete Guide
A curbless shower fails or succeeds on the floor beneath it, not on the tile above it. Curbless Shower Subfloor Preparation — The Complete Guide starts…
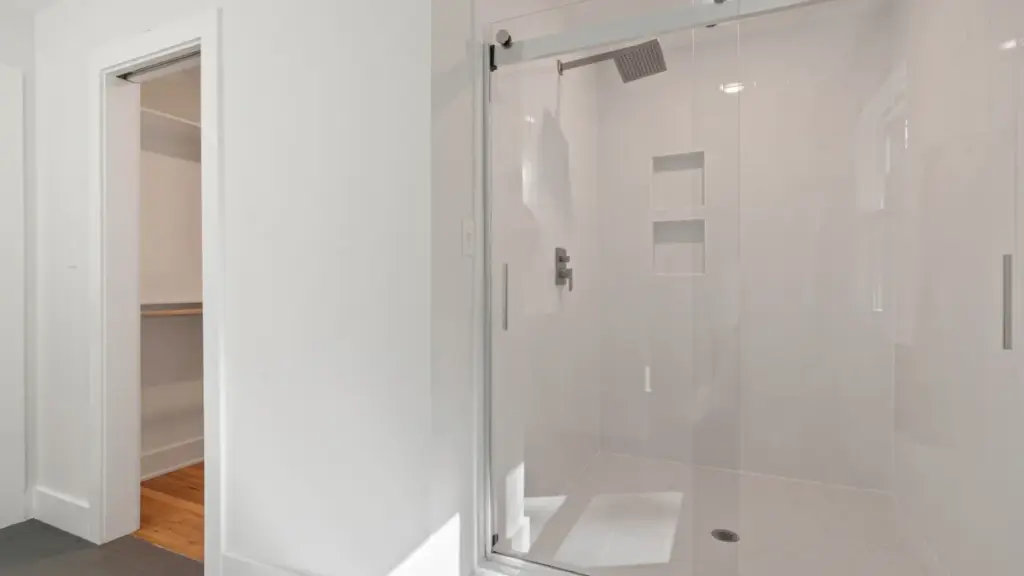
Glass shower enclosure in a modern bathroom
Last updated: November 15, 2026
Key Takeaways
- Weak framing, sheathing, or drain planning can compromise the whole build.
- Allow room for the drain, slope, and finish layers before the floor becomes too shallow.
- Recessed floors often suit true low-entry showers, while raised floors fit tighter structural constraints.
- Build stiffness, flatness, and shower-zone slope into the subfloor before waterproofing starts.
A curbless shower fails or succeeds on the floor beneath it, not on the tile above it. Curbless Shower Subfloor Preparation — The Complete Guide starts with the subfloor, because the assembly has to create slope, height, stiffness, and a place for the drain before waterproofing ever starts. This guide settles which floor build-up works, what the framing must do, and where most first-time plans go wrong.
This is the part of the project that tile setters, waterproofing makers, and inspectors care about first. It’s the difference between a low-entry bathroom that drains cleanly and a wet floor that looks right for a week.
What a curbless shower subfloor has to do
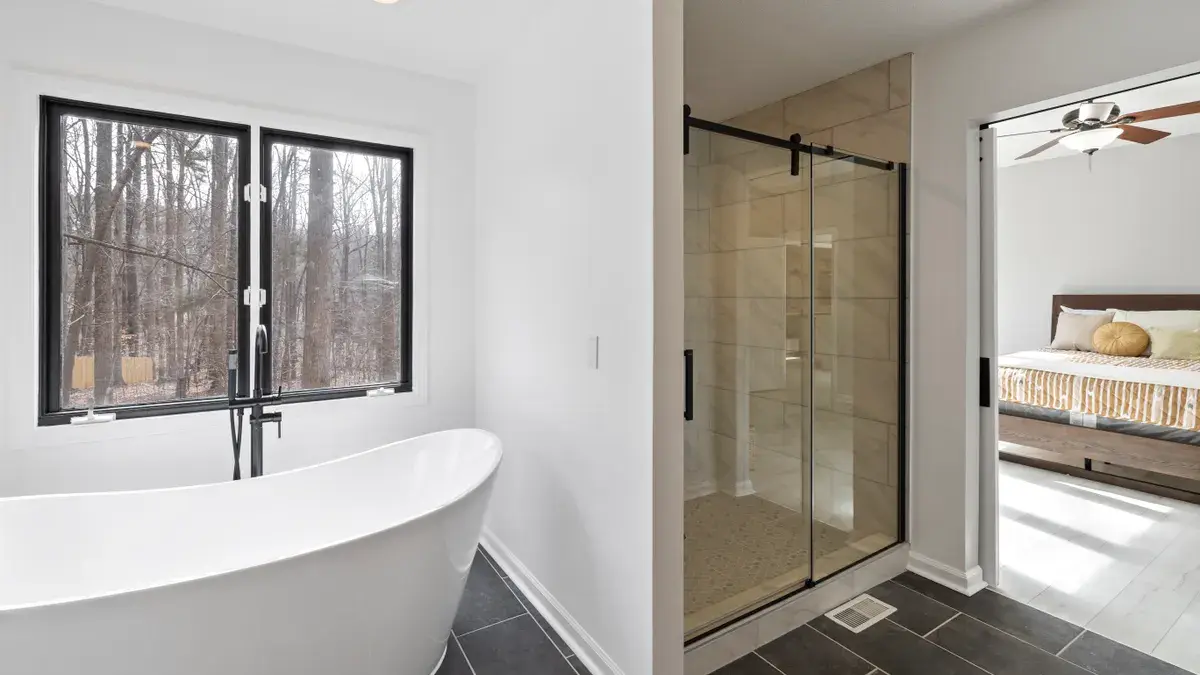
A curbless shower subfloor has to do four jobs at once: hold the load, drop water to the drain, leave no lip at the entry, and accept a waterproof layer without flexing out of shape. If one of those jobs is weak, the rest of the build starts working against you.
Picture this: you’re planning a bathroom where the tile continues right through the entry, but the drain still needs a low point and the finished floor outside the wet area still has to land flat. That sounds simple until framing depth, joist height, and drain type all start competing for the same inch. Here’s the catch: curbless work is really a floor-geometry problem.
A normal shower pan can hide a little sloppiness. A curbless layout won’t. The floor must usually be recessed, stepped, or built up so the finished tile can slope to the drain without creating a visible hump at the entry. The common target is a continuous slope to the drain with no ponding at the transition.
The main parts are usually the same:
- Joists that can carry the load without bounce
- Subfloor sheathing that stays flat and stable
- Sistering, blocking, or recess framing when extra depth is needed
- A sloped mortar bed or pre-sloped shower tray
- A drain system that fits the floor thickness and waterproofing method
A curbless shower is not just “a shower without a curb.” It’s a floor assembly that has to be planned as a whole. If the drain is too high, the entry gets too steep. If the floor is too shallow, the waterproof layer and tile stack get crowded. If the structure flexes, grout cracks and the slope can change.
For reference, the slope question is usually discussed in the tile industry as about 1/4 inch per foot to the drain, and the drain layout has to support that slope from every direction. The exact assembly still depends on the waterproofing system and the drain style.
How much floor depth do you need for a curbless shower?
You need enough depth for the drain, the slope, and the finished tile stack, or the design becomes a compromise instead of a detail. The right answer depends on whether the bathroom is being framed new, altered in place, or built over an existing floor.
Picture this: you’re standing in a room with joists already in place and you want the shower to sit flush with the rest of the bathroom. The question is not “Can it be done?” The question is whether the floor can be lowered enough to create a proper recessed wet area without making the room outside the shower look awkward. On the other hand, if the room is open and the framing is still flexible, you can solve much of this before the subfloor ever goes down.
The depth problem usually comes down to three numbers:
- Drain thickness
- Slope distance
- Finished floor height
A centered drain in a small footprint needs less total drop than a long roll-in path. But curbless entries often need a longer run from the dry floor to the drain, so the slope can eat up a surprising amount of vertical space. A tile assembly that only needs a little drop on paper can become much deeper once thinset, membrane, backer, and tile are added.
The cleanest solutions are usually one of these:
- Recess the shower area between joists so the wet zone starts lower
- Lower the subfloor locally by altering framing where structure allows it
- Raise the entire bathroom floor to meet the drain depth
- Use a bonded waterproof shower system that is designed for low-profile builds
Each option has a trade-off. Recessing can give a cleaner finished transition, but it needs structural coordination. Raising the floor is often easier to frame, but it can change doorway heights and bathroom proportions. A surface-waterproof system can save depth, but it still needs a floor that is flat, stiff, and correctly sloped.
The wrong move is to guess at the depth and “make it work with mud.” That approach often steals from the entry height, creates a steeper threshold than planned, or leaves too little room for waterproofing details at the drain. The floor should be measured from the joist up, not from the tile down.
What usually eats the depth
- A thick drain body
- Two layers of board or underlayment
- Mortar thickness at the perimeter
- Tile plus thinset at the surface
- The height needed to maintain slope without a bump
A few extra millimeters at each layer can force a different floor design. That’s why subfloor prep comes first.
Recessed floor or raised floor: which prep method wins?
A recessed floor usually wins for a true curbless result, while a raised floor wins when structure or plumbing makes recessing too costly. The better choice depends on what the framing can safely support and how much finished-floor change the room can tolerate.
Picture this: you’re deciding between cutting the wet area down between joists or lifting the whole bath up to meet the shower drain. One path keeps the rest of the room looking natural. The other avoids major framing surgery but changes every doorway and transition nearby. The truth is, the right method is the one that preserves slope without creating a new problem outside the bath.
Here’s the head-to-head view.
| Criteria | Recessed Wet Area | Raised Bathroom Floor | Winner for This Condition |
|---|---|---|---|
| Finished transition at entry | Can stay nearly flush if framed correctly | Usually creates a higher overall floor plane | Recessed wet area |
| Framing complexity | Higher; joist work and structural checks matter | Lower; build-up happens above the structure | Raised bathroom floor |
| Impact on door heights | Usually less disruptive | Can reduce clearances at doors | Recessed wet area |
| Room-wide height changes | Local to the shower zone | Can affect the entire bathroom | Recessed wet area |
| Plumbing coordination | Often more demanding at drain location | Sometimes easier if the floor build-up hides lines | Raised bathroom floor |
| Accessibility feel | Better for a true low-step entry | Can create a higher approach elsewhere | Recessed wet area |
| Best in remodels with fixed structure | Sometimes limited by existing joists | Often easier when joists can’t be altered | Raised bathroom floor |
| Best in new construction | Usually the cleaner design if planned early | Possible, but often not the first choice | Recessed wet area |
A recessed wet area is the first choice when the structure can be modified, the drain can be positioned correctly, and the goal is a floor that reads as one plane. It works best in new construction or major remodels where the framing is open enough for real planning. The trade-off is plain: it asks more from the structure, and that can mean engineering input, extra labor, or both.
A raised bathroom floor is easier to build when the framing below is locked in. It can also make drain routing simpler in some layouts. The downside is equally plain: it can change the whole room’s feel, raise the doorway threshold, and make the bath less comfortable for someone who wants a true low-entry transition. It also means the toilet flange, vanity height, and adjacent floor transitions may need more attention.
The right option is the one that lets the drain sit low enough without forcing a step where you didn’t want one. If the room can’t afford a floor raise, recess it. If the framing can’t be altered safely, don’t pretend it can.
How do you prep the subfloor for a curbless shower?
You prep it by making the structure stiff, the surface flat, and the shower zone ready for a sloped build before any waterproofing goes down. The order matters: framing first, sheathing next, slope and drain after that.
Picture this: you’ve got exposed joists, a stack of plywood, and a drain location marked on the floor. It’s tempting to jump straight to waterproofing products, but the real work is underneath. If the floor moves, the membrane can only hide it for so long. The prep has to make the assembly stable before the finish materials go on.
A solid prep sequence looks like this:
- Check joist depth and span against the planned load
- Confirm the subfloor thickness and add plywood if the assembly calls for it
- Reinforce the framing where the wet zone needs a recess or where the drain opening weakens structure
- Set blocking around edges, seams, and any place the membrane or pan needs support
- Lay out the drain height before the slope is built
- Create the sloped surface with mortar, a formed tray, or a system approved for curbless use
- Keep the floor flat outside the wet zone so the transition does not telegraph through the tile
The subfloor should be dry, clean, and rigid. Any squeaks, dips, or soft spots should be fixed before work continues. Plywood seams should be supported where needed, and fasteners should be placed according to the chosen underlayment or waterproof system. If the build uses a sheet membrane or bonded drain, the floor surface must meet that manufacturer’s requirements, not just “look okay.”
The tile industry often talks about the substrate as a system. If the floor is out of plane, the tile layer can’t correct it without creating extra height, lippage, or a strange slope at the threshold. A curbless entry shows every error.
One useful way to think about prep is this:
- Structure supports the weight
- Subfloor supports the slope
- Drain sets the low point
- Waterproofing protects the whole assembly
- Tile only finishes what the layers below already solved
That is why generic bathroom floor prep advice falls short here. A curbless floor is not ordinary tile work with the curb removed.
What drain type works best with a curbless shower?
A drain that fits the floor build-up and supports a low-entry slope works best, not the fanciest drain on the shelf. The right drain is the one that matches the depth available, the waterproofing method, and the shape of the wet zone.
Picture this: you’re choosing between a center drain, a linear drain, or a bonded drain system, and each one changes the slope story. A center drain needs a pan that falls from every side. A linear drain can simplify the slope, but it also needs accurate placement and the right membrane detail. The drain choice sets the whole floor geometry.
A few common drain approaches:
- Center drain with sloped mortar bed: classic and dependable, but it needs enough depth on all sides
- Linear drain at one side or entry: can make the floor easier to slope in one direction
- Bonded waterproof drain systems: often paired with surface membranes and low-profile assemblies
The strongest argument for a linear drain is simple: it can reduce the visual complexity of the slope. Instead of four-way pitch, the floor can often fall in one direction. That can help when the shower is narrow, when the entry has to stay low, or when the floor depth is tight. The cost is not just money; it’s detail sensitivity. The drain must be installed exactly where the build expects it, and the floor around it must still drain fully.
A center drain is familiar and often easier to understand in standard builds. The downside is that it demands more overall slope area. In a curbless layout, that can push the perimeter too high or the entry too steep if the room is small.
Whatever style is chosen, the drain has to match the waterproofing plan. A drain made for a topical membrane is not the same as one intended for a traditional liner. Mixing systems can create a hidden failure. The box, the instructions, and the drain flange all have to agree.
The right drain is not the one with the most features. It’s the one that lets the floor stay low, the slope stay even, and the waterproofing stay continuous.
What does the waterproof layer need from the subfloor?
The waterproof layer needs a flat, stable, and correctly sloped base, because membrane work cannot fix a crooked substrate. If the floor below it is wrong, water will still find the low spots and the finish will show it.
Picture this: you’ve reached the point where the shower looks ready for membrane, but the subfloor still has a small dip near one corner and a ridge near the entry. That’s the moment to stop. Waterproofing is not a filler. It follows the shape of the floor underneath, and in a curbless build that shape matters more than almost anything else.
A good waterproof layer needs:
- Continuous support with no soft voids
- Proper overlaps or seams as required by the system
- A drain connection that matches the membrane type
- A slope that directs water to the drain without puddling
- A transition at the entry that doesn’t break the plane
There are two broad approaches. A surface-applied waterproofing system puts the membrane close to the tile surface. A traditional pan system hides waterproofing below a mortar bed. Both can work, but the surface system often gives better control in curbless layouts because it keeps the assembly thinner and dries faster. That said, it also demands careful detailing around the drain and seams.
The subfloor needs to be ready before the membrane goes down. Once waterproofing starts, changes become messy and expensive. A patched floor under a membrane can still fail if the patch moves. A mortar bed with the wrong slope can still hold water even if it’s technically waterproof.
This is also where the entry without a curb becomes real. The waterproof layer has to continue through the transition without making a hump or dip that telegraphs into the finished tile. If the membrane ends early or folds awkwardly, the floor may still be technically waterproof in the shower but wrong at the edge.
For this stage, two authoritative references are worth keeping close: the Tile Council of North America Handbook and the manufacturer’s install instructions for the exact membrane and drain being used. That pairing matters more than generic advice from a forum.
Why do curbless floors fail so often at the threshold?
Curbless floors fail at the threshold because the transition zone tries to do too many things in too little space. It has to stay low, carry water back toward the drain, support tile, and look flat from the room side.
Picture this: you’re standing at the shower entrance and the tile changes slope under your feet. If the slope starts too early, the dry floor feels tilted. If it starts too late, water can escape. If the floor is too flat, water sits at the entry. That one strip of floor decides whether the whole project feels intentional or awkward.
The main threshold mistakes are predictable:
- Not enough slope to the drain
- Too much slope too close to the entry
- Drain set too high
- Subfloor flex at the opening
- Waterproofing that stops short of the transition
- Tile layout that forces a tiny sliver cut at the entry
The threshold also exposes framing errors. If the floor was not stiff enough before the slope was built, the entry area may crack first because it gets foot traffic and water movement at the same time. If the recess is uneven, the transition tile can sit proud or dip, and both are bad.
A good threshold is not invisible by accident. It is planned. The slope should begin where the assembly needs it, not where tile layout makes it convenient. The wet area and dry area should feel like one floor, but the water path still has to be obvious to the floor underneath.
One practical rule: if the transition looks dramatic in the subfloor stage, it will probably look worse after tile. Fix the shape before the finish layer goes on. That is where many DIY builds try to save time and end up rebuilding.
The threshold is also where accessibility and waterproofing meet. A lower entry helps movement, but only if the water still stays where it belongs. A curbless shower that leaks at the lip has missed the point.
When should you stop and bring in a pro?
You should stop and bring in a pro when the framing, drain, or waterproofing detail is no longer simple enough to verify on paper. A curbless shower is not a good place to guess about structure, code, or membrane compatibility.
Picture this: you’ve opened the floor and found joists that are smaller than expected, plumbing that is in the way, or a drain location that won’t allow the slope you planned. That’s not a cosmetic problem. It’s a structural and waterproofing decision. If the assembly changes, the math changes with it.
The most common stop points are:
- Joist size or span uncertainty
- A need to cut or alter framing members
- Drain placement that conflicts with plumbing
- A floor that needs a large recess
- A waterproofing system with specific bonding requirements
- A project intended to meet accessibility goals
This is the point where local code, product instructions, and structural limits matter more than internet advice. The International Residential Code and the ADA Standards for Accessible Design are useful reference points when the project touches floor height, doorway clearances, or accessibility planning. Those documents do not replace the product instructions, but they help frame the constraints.
For the standards themselves, these pages are the most direct starting points:
- ADA Standards for Accessible Design: https://www.ada.gov/law-and-regs/design-standards/2010-stds/
- U.S. Department of Justice ADA home page and technical assistance: https://www.ada.gov/
A pro is also the right move if the floor needs an unusual drain location or the structure has already been modified once. Every extra cut in a joist or subfloor piece raises the stakes. The cost of a second attempt is often greater than the cost of doing the layout correctly the first time.
This is not a sign of failure. It’s a sign that the project moved from “tile prep” into “floor system design.”
The practical verdict: what to do first, and what not to do
Start with the framing, not the finish. If the joists, subfloor, and drain depth are right, the rest of the curbless shower build becomes manageable; if they’re wrong, the tile work only hides the problem for a while.
Picture this: you’re at the point where you want a clean walk-in entrance, but the room still needs a way to create slope without a curb. The practical move is to choose the floor strategy first, then match the drain and waterproofing to that strategy. Don’t reverse it. The drain does not dictate the whole floor by itself, and tile layout definitely shouldn’t.
Choose a recessed wet area if the structure can be altered safely and the goal is a true low-entry finish. Choose a raised bathroom floor if the framing won’t allow a recess and the room can absorb the added height. Skip both if the plan depends on guessing at slope, mixing incompatible waterproofing parts, or forcing a flat floor to do a sloped floor’s job.
The biggest mistake is treating curbless prep like ordinary bathroom subfloor work. It isn’t. The floor must be designed as a water-management system from the joists up. Once that clicks, the rest of the project makes sense.
FAQ
How flat does the subfloor need to be before a curbless shower is built?
The subfloor needs to be flat enough that the slope is created on purpose, not by accident. Small dips can turn into puddles once tile and waterproofing go on, so the floor should be corrected before membrane work starts. A curbless layout shows irregularities more clearly than a standard shower.
Can a curbless shower be built over an existing floor?
Yes, but only if the existing structure can provide the needed depth, stiffness, and drain layout. Many remodels need a recess, a raised floor, or both. If the current joists and subfloor don’t leave enough room for slope, the project may need framing changes before tile work can begin.
Is a linear drain better than a center drain for a curbless shower?
A linear drain is often easier to pair with a low-entry floor because it can reduce the amount of slope needed across the surface. That makes it useful in tight or shallow builds. A center drain still works well, but it usually asks for more depth and a more complex slope pattern.
Does curbless shower prep need special waterproofing?
Yes, it needs a waterproofing system that matches the drain and the floor build-up. Surface membranes and bonded drains are common choices in low-profile builds because they keep the assembly thin and easier to slope. The exact parts have to be compatible, or the system can fail at the joints.
What is the biggest mistake people make with curbless subfloor prep?
The biggest mistake is starting with tile layout instead of floor depth and drain placement. That usually leads to a threshold that is too steep, a drain that sits too high, or a floor that can’t slope correctly. The subfloor has to be solved before the finish layer is even on the table.
Drafted with AI; not yet reviewed by a person.