Curbless Shower ADA and Barrier-Free Design Guide
Curbless Shower ADA and Barrier-Free Design — The Complete Guide: 1 system. A curbless shower needs the right slope, clear floor space, and safe controls…
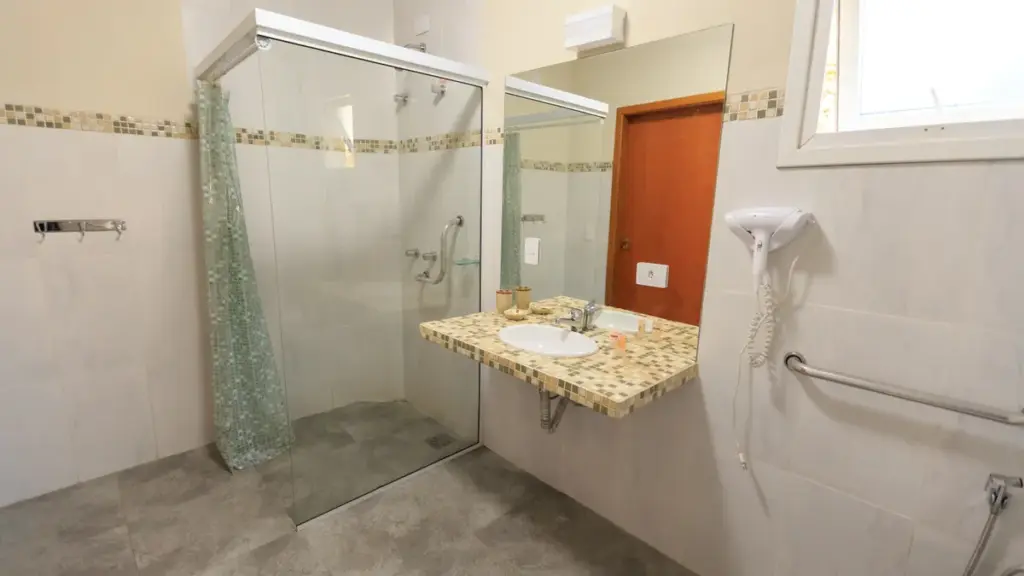
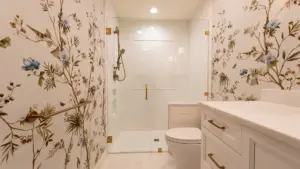
Bathroom with glass shower, vanity, and tiled floor
Last updated: November 13, 2026
Quick Answer: 1 system. A curbless shower needs the right slope, clear floor space, and safe controls or it becomes hard to enter, hard to drain, and hard to keep dry. The answer is yes, it can be ADA-friendly and barrier-free—but only if the floor, drain, and entry are designed as one system. The sections below settle what “correct” looks like in Curbless Shower ADA and Barrier-Free Design Guide, what the ADA actually asks for, and where most bad builds go wrong.
Key Takeaways
- A curbless entry is not just a missing curb; it is a floor system that controls water, supports safe access, and keeps the whole room usable.
- The drain location changes everything. A center drain, linear drain, or offset drain each needs a different slope plan.
- ADA is not the same thing as “nice to have.” Clear space, controls, grab bars, and turning room all matter.
- A barrier-free bathroom can still fail if the floor pitches the wrong way or the entry floods.
- Good design starts before tile goes in. Framing, waterproofing, and subfloor thickness decide whether the build works.
What makes a curbless shower ADA-friendly?
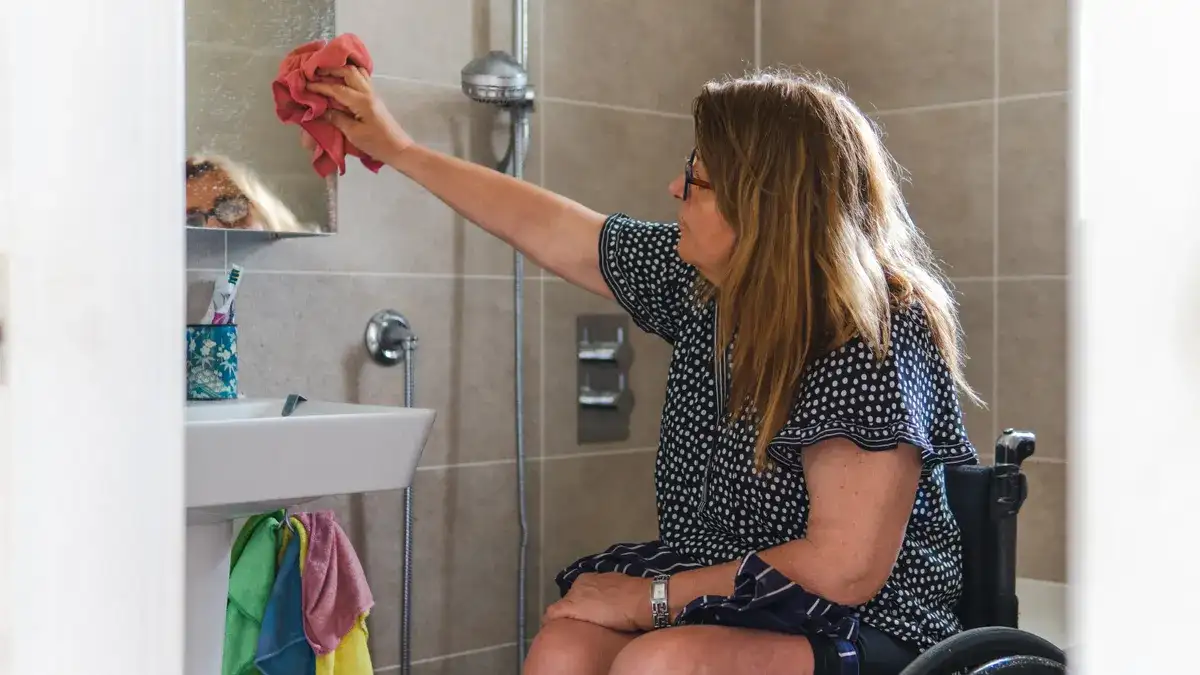
A curbless shower is ADA-friendly when the entrance can be used without a step and the bathing area still meets access, safety, and water-control needs. The design is not just about removing a threshold. It is about creating a low or zero-entry floor that drains correctly and still leaves room for safe movement.
Picture this: you’re standing in a bathroom with a flat transition at the entry, a drain that catches water before it reaches the door, and controls that you can reach before you get sprayed. That is the goal. A good layout gives you no raised curb, a clear path, and a floor that slopes only where it should.
The ADA rules used in commercial settings and many accessibility checklists focus on usable space, reach ranges, and safe transfer. For a home, local code may differ, but the practical targets are similar: keep the entry flush, give enough room to enter, and make controls reachable without stepping deep into the wet area.
Here’s the catch: a curbless entry that looks clean can still be wrong if water runs into the room or if the slope feels like a ramp underfoot. The floor needs a plan, not just a finish.
| Design element | Good practice | Bad practice |
|---|---|---|
| Entry | Flush or nearly flush | 1+ inch step at the threshold |
| Floor pitch | Directed to drain | Slope that pulls water into the bathroom |
| Controls | Reachable from the entry zone | Controls placed deep in the wet area |
| Turning room | Enough open floor for maneuvering | Fixtures crowd the path |
The ADA Standards for Accessible Design are published by the U.S. Access Board: https://www.access-board.gov/ada/guides/chapter-6-shower-compartments/. For a plain-language safety angle, the CDC’s fall-prevention pages also help frame why level transitions matter: https://www.cdc.gov/falls/index.html.
How much space does a barrier-free shower need?
A barrier-free shower needs enough clear floor space for the user, not just enough tile for the plumber. The exact dimensions depend on the layout, but the space around the entry, inside the bathing area, and in front of fixtures should be planned before framing starts.
Picture this: you’re looking at a bathroom sketch and the shower fits on paper, but the toilet, door swing, and vanity leave no room to approach it straight on. That is where many projects fail. The opening may be flat, yet the bathroom is still not truly barrier-free because the route in and out is cramped.
A common mistake is to think the shower footprint alone solves access. It doesn’t. The shower is part of a bigger movement zone that includes the door, the sink, and the turning path. In a small room, a curbless entry can actually make things harder if the floor slopes steal space from everything else.
- Map the full approach path. Check the clear path from the bathroom door to the shower opening. Do not start with tile size.
- Mark the transfer zone. Check where a user would stop, turn, or sit. Do not place the drain there.
- Reserve floor area for equipment. Check space for a bench, folding seat, or mobility aid if needed. Do not crowd it with shelves.
- Check door swing and entry width. Do not let the door hit the access route.
- Place the controls on the dry side. Check that the hand can reach them before stepping fully in. Do not hide them behind the spray line.
- Confirm turning room. Do not rely on “close enough” measurements; test the layout on the floor plan.
The standard dimensions for accessible shower compartments are addressed in the ADA guidelines, and layout decisions should be verified against the project’s local code set. For engineering and code review, the International Code Council and the local building department may matter as much as the fixture spec. If you are working on a home, an architect or experienced contractor should check the room before demolition.
| Layout item | What to look for | What to avoid |
|---|---|---|
| Entry opening | Straight approach | Tight corner entry |
| Bench zone | Stable, dry access | Seat in splash path |
| Controls | Reach without stepping far in | Controls behind the spray |
| Door clearance | Door can open without blocking access | Door wedge that traps movement |
How does the floor drain and slope actually work?
The drain and slope work together to move water out without making the floor feel tilted or unsafe. A curbless shower usually needs a recessed wet area, a sloped floor, or both, and the drain must match that geometry.
Picture this: you’re looking at a finished floor where the tile lines seem flat from the doorway, but the water still heads cleanly toward the drain instead of across the room. That effect does not happen by accident. The slope is built into the structure, hidden under the finish, and shaped around the drain type.
The big choice is the drain location. A center drain often needs a four-way pitch, which can create a “broken” floor plane. A linear drain can let the floor slope in one direction, which often looks cleaner and works better for large-format tile. An offset drain can solve certain room shapes, but only if the subfloor is planned for it.
- Choose the drain type first. Check whether the room suits center, linear, or offset placement. Do not pick the drain after tile is chosen.
- Set the finished floor height. Check how much recess the structure allows. Do not assume you can just shave down the shower floor.
- Build the slope into the substrate. Check the pitch before waterproofing. Do not rely on thick mortar alone.
- Dry-fit the tile layout. Check where cuts will land at the drain and the entry. Do not create tiny slivers at the edge.
- Test water flow before final finish. Check that water heads to the drain without pooling. Do not wait until after grouting.
- Seal the transition carefully. Check every seam at the drain, corners, and wall base. Do not leave a weak point at the entry.
A typical accessible wet area is built to slope toward the drain while keeping the rest of the bathroom as level as possible. That balance is the whole trick. Too much slope and the floor feels awkward. Too little slope and water spreads.
| Drain type | Best use | Strength | Limitation |
|---|---|---|---|
| Center drain | Small, balanced layouts | Simple water pull from all sides | More complex tile plane |
| Linear drain | Wide or modern layouts | One-direction slope, easier large tile | Needs careful placement |
| Offset drain | Odd room geometry | Can solve layout conflicts | Requires precise framing |
The Tile Council of North America publishes methods and standards that are often used for shower receptor details: https://www.tcnatile.com/. For waterproofing and substrate planning, the manufacturer instructions matter too; a curbless build is not a place to improvise. For more project context, see shower drainage options, bathroom waterproofing basics, and accessible bathroom layout guide.
What is the correct way to build the threshold and waterproofing?
The correct way is to treat the threshold as a waterproof transition, not a decoration. A barrier-free entry still needs a protected edge, continuous waterproofing, and a floor assembly that keeps water where it belongs. If the room is unusual or the structure is uncertain, consult a qualified professional and verify the details against the product instructions and local code before building.
Picture this: you’re kneeling at the doorway and looking at the change from bathroom floor to wet area. The key here is the transition line — notice how it should disappear visually while still controlling water. That is what separates a clean access point from a leak waiting to happen.
Many bad builds fail at this exact spot. The tile may be flat, but the layer underneath may not be recessed enough. Or the waterproof membrane may stop short of the entry. Or the floor may be level at the doorway while water slowly migrates outward under the tile. The result is damage, swelling, mold risk, and repairs that cost far more than the original build.
A correct threshold detail usually includes a recessed shower floor, a properly sloped waterproof pan, and waterproofing that ties into the surrounding floor assembly. In some builds, the bathroom floor is lowered in the wet zone. In others, the structure is adjusted so the finished surface stays flush while the waterproof layer handles the height change.
- Plan the recess early. Check joist depth, slab height, or subfloor buildup. Do not leave threshold height to the tile setter.
- Install continuous waterproofing. Check corners, seams, and penetrations. Do not stop the membrane at the doorway edge.
- Create the slope under the finish. Check that water moves to the drain from every wet point. Do not try to correct slope with tile alone.
- Set the transition profile. Check that the entry stays safe under bare feet, a wheelchair, or a rolling shower chair. Do not use a sharp metal edge where feet contact it.
- Protect nearby flooring. Check the dry side for splash control. Do not assume a curtain will solve a leaky transition.
- Flood-test before finish work continues. Check for leaks and ponding over several hours. Do not grout a system that has not been tested.
Here’s the catch: waterproofing is not visible after the job is done, which is exactly why it gets rushed. A pretty tile surface can hide a poor substrate, and a poor substrate may not show up until later.
| Threshold detail | Correct result | Incorrect result |
|---|---|---|
| Membrane coverage | Continuous across corners and entry | Gaps at the doorway |
| Floor recess | Enough depth for slope and drain | Flat floor with no room for pitch |
| Entry edge | Safe underfoot, low profile | Hard lip or exposed edge |
| Transition zone | Dry side stays protected | Water tracks beyond the wet area |
For code and product details, membrane and drain manufacturers’ installation manuals should be read alongside local building rules. The official instruction sheet is not optional in a curbless build; it is part of the design. See also waterproof shower membrane guide and ADA bathroom code overview.
Which fixtures and details make access easier?
The right fixtures make the room easier to use, but only if they sit in the right place. Grab bars, a bench, a handheld shower, and controls work best when they support movement instead of blocking it.
Picture this: you’re standing at the entry and you can see the grab bar, the seat, and the control handle without stepping into spray. The key here is the relationship between parts — notice how each item supports a different action. One helps balance, one helps rest, one helps rinse, and one helps enter.
A bench is helpful when a person needs seated washing or transfer support, but it must not become a barrier. A fold-down seat saves space in a small room. A fixed bench gives more stability but eats floor area. A handheld shower on a slide bar adds reach, but only if the hose length and control placement support the seated position.
The finish matters too. A slip-resistant tile is better than a glossy one in a wet zone, but texture alone will not save a bad slope. Wall-mounted controls near the entrance help reduce exposure to cold water and help a user start the flow before going deeper into the wet zone. The hardware should be reachable without a hard twist or a deep lean.
- Select the bench type. Check if the user needs fixed support or a fold-down option. Do not place the seat where the door or spray will hit it.
- Set grab bar height and location. Check that the hand lands naturally from sitting or standing. Do not mount bars based on tile lines alone.
- Place the handheld shower. Check hose reach from bench to drain area. Do not let the hose drag across the floor.
- Choose control placement. Check that the valve can be reached before full entry. Do not put hot water control where it must be grabbed through spray.
- Pick a floor finish with traction. Check slip resistance in wet conditions. Do not choose a surface just because it looks clean in a sample board.
- Keep storage out of the path. Check that shampoo niches do not force shoulder twist. Do not make the entry lane narrower with shelves.
The Americans with Disabilities Act Design Manual and related guidance from the Access Board give the framework for accessible fixtures. A local code official may also care about grab bar backing, fixture spacing, and valve types. Those details are small on paper and huge in daily use. For more on fixtures, see ADA grab bar placement and accessible shower seat options.
What does a good curbless layout look like compared with a bad one?
A good curbless layout looks calm: flat entry, controlled slope, reachable fixtures, and no water migration into the rest of the room. A bad one looks tidy in photos but fails in use because the floor, drain, and fixtures fight each other.
Picture this: you’re comparing two drawings. In one, the shower opening is flush, the drain sits where water naturally falls, and the controls are near the entry. In the other, the tile is flat at the doorway, but the slope sends water sideways, and the user has to reach through spray to adjust the temperature.
The difference is not style. It is sequence. A good layout starts with structure and movement. A bad layout starts with finish choices. That order is backwards.
| Element | Good layout | Bad layout |
|---|---|---|
| Entry | Flush or near-flush | Small curb or step still present |
| Floor | Controlled slope to drain | Random pitch or ponding |
| Controls | Reachable from a safe stance | Deep inside wet zone |
| Bench | Supports sitting or transfer | Blocks the access path |
| Cleaning | Water clears in use | Soap and water collect at the edge |
- Start with the body in motion. Check how a person enters, turns, sits, and exits. Do not start with tile color.
- Place the drain under the water path. Check the likely spray and splash area. Do not let the drain fight the room geometry.
- Set the controls near the entry. Check that the hand can find them before stepping in. Do not bury them behind a fixed panel.
- Keep the bench out of the route. Check whether a wheelchair, walker, or standing user can pass. Do not sacrifice movement for storage.
- Allow enough dry zone. Check that the floor outside the wet area stays usable. Do not let the wet zone swallow the whole room.
- Review the sightlines. Check if the layout is easy to understand at a glance. Do not build a space that feels like an obstacle course.
The practical test is simple: can the room be used without a hop, a hard step, or a splash problem? If the answer is no, the design is not barrier-free yet.
What do code, safety, and maintenance require over time?
Code, safety, and maintenance require a build that stays functional after daily use, cleaning, and wear. A curbless shower can pass the first day and still fail a year later if it traps moisture, stains easily, or becomes slippery.
Picture this: you’re looking at a room after months of use. The tile still looks good, but the caulk lines are split, the grout at the entry is dark, and water keeps finding the same low spot. That is the maintenance story most people miss at the planning stage.
The first thing to protect is the waterproofing line. The second is the slope. The third is the sealant at movement joints. Hard scrubbing, standing water, and poor ventilation punish weak details. Even a well-built curbless entry needs regular inspection at the drain, corners, and transition points.
A safer room also depends on cleaning habits. Soap film on a textured surface can make traction worse. A floor that drains slowly leaves mineral spots and mildew. Good design reduces that burden, but no design eliminates upkeep completely.
- Inspect the entry line regularly. Check for cracks, loose grout, or dark staining. Do not ignore a small change at the threshold.
- Check drainage after cleaning. Pour a measured bucket of water and watch the flow. Do not assume the drain still performs the same way forever.
- Replace failed sealant early. Check corners and joints every few months. Do not wait for visible water damage in the adjacent floor.
- Keep ventilation working. Check fan performance and run time. Do not let steam sit in a closed room.
- Use cleaners that match the surface. Check the tile and membrane manufacturer guidance. Do not attack the floor with a harsh product just because it shines fast.
- Review safety hardware. Check grab bars, seats, and controls for looseness. Do not let hardware wobble before it is fixed.
The Center for Disease Control and Prevention keeps fall-prevention guidance that is worth reading for any bathroom project: https://www.cdc.gov/falls/index.html. For accessibility rules, the Access Board remains the clearest public reference. Those pages won’t design the room for you, but they show why the details matter. See also bathroom ventilation guide and tile cleaning and care.
How do I know if my bathroom is a candidate for a curbless build?
Your bathroom is a candidate if the structure can support a recessed wet area, the room has enough clear approach space, and the drainage plan can keep water inside the bathing zone. If the floor system cannot support that, the design may need to change before a single tile is removed.
Picture this: you’re standing in a small bath and measuring from the wall to the door swing, then from the joist depth to the finished floor. The key here is not the tile size — it is the structure below it. A room can look big enough and still fail once the floor build-up begins.
A common candidate has one of three things: a slab that can be modified, joists that allow a recessed wet zone, or a layout large enough to manage a linear drain and gentle slope. The less favorable candidates have a thin floor assembly, little room for drain placement, and a door or vanity crowding the entry.
A curbless design is also a stronger fit when the user needs independent access, wheelchair entry, or future-proofing for aging in place. It is a weaker fit when the bathroom is tiny, the drain route is complex, or the surrounding floor cannot be adjusted without major reconstruction.
- Check the structure. Look at slab, joists, or floor thickness. Do not guess at hidden depth.
- Check the approach. Measure the route into the room and around fixtures. Do not focus only on the wet zone.
- Check the drain path. Decide where the water will actually go. Do not force a drain into the last empty corner.
- Check the wall system. Confirm backing for grab bars and controls. Do not assume drywall alone is enough.
- Check the user’s needs. Review whether the space must support standing, seated, or rolling access. Do not design for a generic user.
- Check maintenance tolerance. Decide how much cleaning and upkeep the household can realistically handle. Do not choose a delicate assembly for a rough-use room.
The honest answer is that not every bathroom should become curbless. A good design respects the building, not just the trend. If the structure, room size, or water management is wrong, a low-threshold shower may be better than a full barrier-free conversion.
What should I ask before I build one?
You should ask about slope, drain type, waterproofing, clear space, and who will use the room day to day. Those five questions catch most mistakes before they become expensive repairs.
Picture this: you’re in the planning phase, and every person involved has a different idea of what “accessible” means. The designer sees style, the contractor sees framing, and the homeowner sees convenience. The right questions force those views into one plan.
Use this short checklist before the work starts:
- Where does the slope begin and end?
- What drain type fits the room shape?
- How will the waterproof layer tie into the floor outside the wet area?
- Can the door, vanity, and toilet still leave clear movement space?
- Are the controls, grab bars, and bench positioned for the actual user?
If one of those answers is vague, the plan is not finished.
FAQ
Is a curbless shower the same as an ADA shower?
No, it is not the same thing. A curbless shower describes the entry style; ADA refers to access rules and usable features. A shower can be curbless and still fail accessibility if the clear space, controls, or floor slope are wrong.
Does a barrier-free shower always need a linear drain?
Not always. A center drain can work in the right layout, but it usually changes the slope pattern and tile plan. A linear drain is often easier to fit in large or modern layouts because it can support a single-direction slope.
Can I put a curbless shower in a small bathroom?
Yes, sometimes you can, but the structure and clear space have to work together. Small rooms often need more careful drain placement and tighter fixture planning. If the doorway, vanity, or toilet crowds the room, the design may need a different solution.
What is the biggest mistake people make with barrier-free design?
The biggest mistake is treating the floor like a finish problem instead of a water-management system. The wrong slope, poor waterproofing, or a weak transition can ruin the room even when the tile looks excellent. Access only works when the structure under it is right.
Do I need professional help for a curbless build?
Yes, in most cases you should have a qualified builder, designer, or code-aware professional review the plan. Curbless work ties together framing, waterproofing, drainage, and accessibility rules. A mistake in any one of those areas can be expensive to fix later.
Drafted with AI; not yet reviewed by a person.


2 thoughts on “Curbless Shower ADA and Barrier-Free Design Guide”