Curbless Shower Mistakes to Avoid Before You Build
Avoid the slope, drain, waterproofing, and sizing mistakes that cost the most to fix after a curbless shower is built. A pre-build checklist.
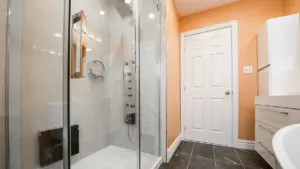
Image: jarmoluk via Pixabay
The most common curbless shower mistakes happen before the tile ever goes down: building to a single slope number instead of a code-allowed range, blocking the drain’s weep holes with mortar, skipping the waterproofing manufacturer’s own extension-distance instructions, and sizing the compartment without checking ADA sizing references. Catching these before construction starts is far cheaper than fixing a leak or a too-small shower afterward.
Key takeaways
- Shower floor slope has a code-allowed range (1/4 to 1/2 in. per foot per IRC §P2709.1) — building to a single, often-repeated number without checking your installer’s plan is a common gap.
- A mud-set floor’s weep holes need to stay clear of hardened mortar, per TCNA method guidance for mud-set receptors (B414/B415 family) — this is a step that is easy to skip under time pressure.
- No single verified “membrane must extend X inches” number exists across all waterproofing systems — the specific manufacturer’s installation instructions are the real source.
- ADA sizing references (U.S. Access Board / ADA 2010 Standards §608.2) are a useful design benchmark for a home remodel even when not legally required — use them to avoid building a compartment too small for how it will actually be used.
- Any work that changes the subfloor, drain location, or slope is structural and waterproofing work. It needs a licensed contractor and, in many areas, a permit — this is not a DIY step.

Why do curbless shower mistakes cost more than standard shower mistakes?
A standard shower has a curb that acts as a backstop: even if the slope is a little off or the waterproofing has a weak spot, the curb often contains the water long enough that nobody notices for years. A curbless shower removes that backstop on purpose, so small building mistakes show up faster — as water reaching the bathroom floor — and they are harder to fix after the fact because fixing the floor usually means reopening it.
That is why this list is about the pre-build checklist, not the after-the-fact leak diagnosis. If you are already seeing water on the floor, that is a different, more urgent problem covered in this site’s leaking-shower article instead.
Mistake 1: Treating the floor slope as one fixed number
A commonly repeated “1/4 inch per foot” figure is the code minimum, not the only allowed slope. The International Residential Code, Section P2709.1, states the finished shower floor “shall slope uniformly toward the drain not less than 1/4 unit vertical in 12 units horizontal (2-percent slope) nor more than 1/2 unit vertical per 12 units horizontal (4-percent slope).” That is a range. Section P2709.3 separately requires the waterproofing liner itself to slope at 1/4 in. per foot to the weep holes in the subdrain.
The fix is simple to ask for but easy to skip: get your contractor’s planned slope in writing before the mortar goes in, and confirm it falls inside that 1/4 to 1/2 in. per foot range. A claim that some jurisdictions allow a flatter 1/8 in. per foot slope could not be confirmed against any code text researched for this article — treat that figure as unverified, not something to request or accept.
Mistake 2: Letting mortar block the drain’s weep holes
A traditional mud-set shower receptor has a waterproofing liner below the visible mortar bed, with weep holes that let any water that gets past the top layer drain away instead of getting trapped. Trade sources describing the relevant TCNA installation method family (B414/B415, quoted from supplier and contractor trade pages rather than a directly read TCNA Handbook in researching this article) describe surrounding the drain with pea gravel or another weep-hole protector before the top mortar bed is poured, specifically so the mortar does not seal those holes shut.
If this step gets rushed or skipped, the secondary drainage path effectively stops existing, even though the shower may look and drain fine on the surface for years until the top waterproofing eventually fails somewhere. Ask your contractor directly whether weep protection was installed and how.
Mistake 3: Guessing at the waterproofing membrane’s extension distance
Waterproofing membranes are generally required to extend past the shower opening onto the surrounding floor, not stop exactly at the threshold line — but a single, generic “extend it X inches” number that applies across every manufacturer’s system was not found while researching this article. Manufacturer instructions vary by product.
The fix: whoever is installing your specific waterproofing system (bonded membrane, pan liner, or a bracket-recessing kit) should be following that product’s own written installation instructions for the extension distance, not a rule of thumb from a different brand’s manual or a contractor blog.
Mistake 4: Sizing the compartment without checking an accessibility reference
Even homeowners who are not building to formal ADA requirements often use the U.S. Access Board’s sizing guidance as a practical benchmark, because it is the most carefully worked-out set of numbers available for how much room a person actually needs to use a shower safely, with or without mobility equipment. The Board’s 2010 ADA Standards for Accessible Design, §608.2, lay out three compartment types: a transfer-type shower at 36 by 36 in., a standard roll-in shower at 30 by 60 in., and an alternate roll-in shower at 36 by 60 in. Threshold height is capped at 1/2 in. maximum, and must be beveled at a 1:2 ratio if it exceeds 1/4 in.
These numbers are a design reference for a private home, not an automatic legal requirement — the ADA Standards themselves apply to public and commercial facilities and certain covered residential settings. The mistake is not failing to meet a legal minimum; it is skipping the reference entirely and ending up with a compartment too small for a future wheelchair, walker, or caregiver-assisted transfer, which is expensive to widen after the fact.
Mistake 5: Not budgeting for ventilation and tile traction changes
A curbless shower, especially one with a glass panel or no door at all, often exposes more of the surrounding floor to moisture and steam than a curbed, enclosed shower does. If the bathroom’s exhaust fan was sized for the old layout, it may be undersized for the new one. Separately, ask for the floor tile’s documented slip-resistance rating in writing, and favor a smaller-format tile with more grout lines on the shower floor itself — grout lines add traction that a single large-format tile does not.
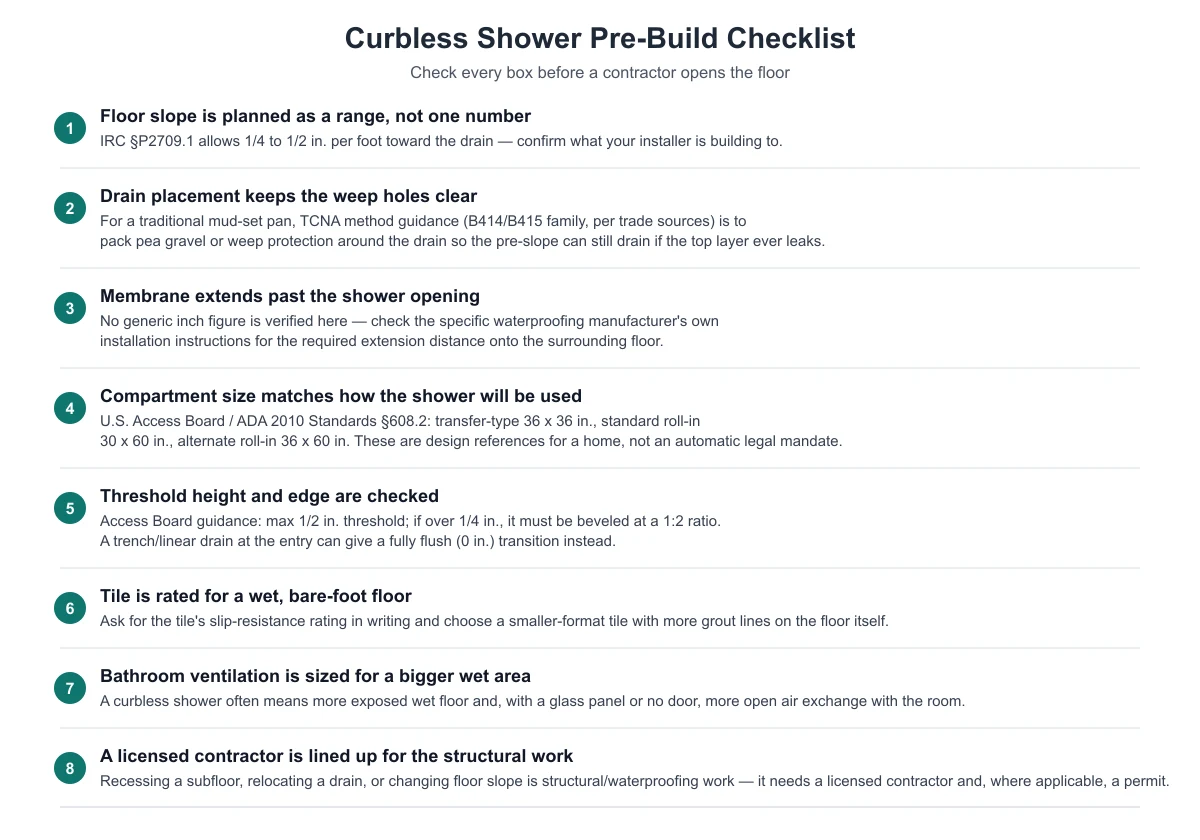
Pre-build checklist
| # | Check | Why it matters |
|---|---|---|
| 1 | Slope is planned within 1/4-1/2 in./ft (IRC §P2709.1) | A single hard-coded number can be wrong in either direction |
| 2 | Weep holes kept clear of mortar (TCNA B414/B415 family) | Secondary drainage only works if it stays open |
| 3 | Membrane extension distance follows the manufacturer’s own instructions | No universal number exists across all systems |
| 4 | Compartment size checked against ADA §608.2 references | Avoids building too small for future mobility needs |
| 5 | Threshold height and bevel checked (max 1/2 in., beveled over 1/4 in.) | Keeps the curbless entry both flush and code-aware |
| 6 | Tile slip-resistance rating requested in writing | A wet, bare floor needs documented traction, not a guess |
| 7 | Bathroom ventilation re-sized for a bigger wet area | More exposed wet floor can mean more moisture load on the room |
| 8 | Licensed contractor lined up for subfloor, drain, and slope work | This is structural and waterproofing work, not a DIY project |
Frequently asked questions
Is a curbless shower more likely to leak than a standard shower with a curb?
Not inherently — both rely on correct slope and continuous waterproofing. A curbless shower simply removes the curb’s backup containment, so mistakes in slope or waterproofing show up as water on the bathroom floor sooner than they would behind a curb.
Do I need a permit to convert an existing shower to curbless?
In many areas, yes, because the work involves recessing or modifying the subfloor and possibly relocating the drain. Check with your local building department before work starts, and confirm your contractor is licensed for the plumbing and structural portions of the job.
Can I use a flatter slope to make the floor feel less sloped underfoot?
Only within the code-allowed range your jurisdiction enforces, and only if your specific waterproofing and drain system supports it. IRC §P2709.1 sets 1/4 in. per foot as the minimum, not a number you can go below by default — ask your contractor to confirm in writing what slope they are building to and why.
What is the single biggest pre-build mistake homeowners make?
Based on the issues covered above, the most common pattern is treating slope, membrane extension, and compartment size as single fixed numbers pulled from a blog post, instead of confirming the actual code range, the specific product’s installation instructions, and a sizing reference like the ADA guidance — each of which is more nuanced than one number.
Sources
- up.codes, 2021 IRC (Colorado-adopted), Section P2709 Shower Receptors
- U.S. Access Board, “Chapter 6: Bathing Rooms” guide
- ADA.gov, 2010 ADA Standards for Accessible Design
TCNA method-family guidance (B414/B415) referenced above was read from trade and supplier pages quoting the TCNA Handbook, not from a directly read TCNA publication — flagged here as a secondary source.
Byline: curblesscraft.com Editorial Team. Last updated: November 13, 2026.
Related reading on this site: Curbless Shower Guide: What It Is, How It’s Built, Is It Right for You, Curbless Shower Leaking Into the Bathroom: Causes and Fixes, Curbless Shower Floor Slope Requirements (Code vs. ADA), and Curbless Shower Size for a Wheelchair: ADA Minimums vs. (Source: Real-World Sizing)

2 thoughts on “Curbless Shower Mistakes to Avoid Before You Build”