How to flood test a curbless shower pan
A curbless shower pan can fail flood testing when the temporary dam leaks, the drain plug is loose, or the water line drops before inspection. This guide…
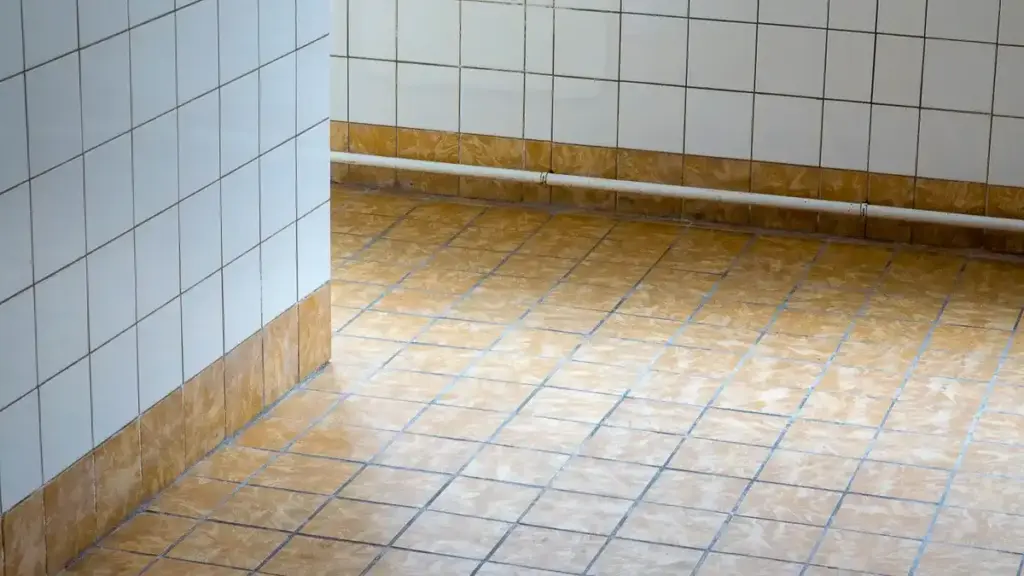
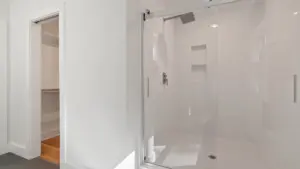
Empty tiled shower area with low threshold
Last updated: November 13, 2026
Key Takeaways
- A curbless shower pan flood test checks whether the waterproof layer holds water at the threshold, drain, and corners.
- You need a sealed drain, a temporary threshold dam, and a clear water line mark before filling.
- Build the temporary clay dam across the full opening, press it to the floor, and check the ends for gaps.
- To flood test a curbless shower pan, seal the drain, seal the threshold, fill to the required level, and watch the line for the inspection hold time.
A curbless shower pan can fail flood testing when the temporary dam leaks, the drain plug is loose, or the water line drops before inspection. This guide shows how to flood test a curbless shower pan with a pneumatic test plug, a temporary clay dam at the threshold, and a steady water line held for the plumbing code inspection time. It starts with the setup, then covers the water level indicator, the hold period, and the common mistakes that affect a curbless shower water test.
What flood testing a curbless shower pan is checking
How to flood test a curbless shower pan starts with one question: does the waterproof layer hold water without loss at the threshold, drain, or corners? In practice, that means creating a small basin inside the wet area and watching a marked water line for movement during the inspection period.
If the floor build is finished and the opening has no curb, the inspector may want proof that the pan can contain water. The threshold detail is the weak point on a curbless layout, so the temporary dam matters as much as the membrane.
A few terms help keep the job straight:
- Pneumatic test plug: an inflatable or mechanical plug that seals the drain opening.
- Temporary clay dam: a removable bead or wall of clay-like material at the threshold.
- Water level indicator: a mark, pencil line, or tape line that lets you see any drop.
- TCNA guidelines: the Tile Council of North America guidance many installers follow for shower waterproofing details.
The point is not to make the room watertight forever. It is to show that the pan, the drain seal, and the threshold assembly can hold water long enough to pass a plumbing code inspection. A sloppy dam can create a false failure, and a sloppy drain plug can create a false pass.
If you need the wider build sequence around this step, the hub on curbless shower waterproofing covers the system around the test. This page stays on the flood test itself.
What do you need before you start the flood test?
You need a sealed drain, a temporary threshold dam, and a way to mark the water line before you add water. That is the whole setup, and it should be ready before the first bucket goes in.
If you are standing in front of an open threshold with no curb, you need a temporary edge that can hold several inches of water without crushing the finish. The right materials are simple, but they have to fit the floor and the opening.
Gather these items first:
- Pneumatic test plug sized for the drain body
- Temporary clay dam material or a removable water-stop product approved for the surface
- Painter’s tape or pencil for the water level indicator
- Bucket or hose with controlled flow
- Sponge or towel for cleanup
- Flashlight to check corners and the drain
- Measuring stick or ruler if your inspector wants a visible depth mark
The drain plug is not optional. A curbless floor can look sealed and still lose water through the drain body if the plug is loose or the wrong size. That leak is fast, and it makes the rest of the test useless.
The threshold dam needs one job: keep the water in place without damaging the floor or leaving residue the installer has to fight later. A bead of clay is often used because it can be shaped, pressed, and removed. If the floor finish is delicate, the wrong dam material can stain it or leave a ridge.
Here is the catch: the supplies are cheap compared with a failed inspection, but the wrong plug or dam can create a bad reading. The test only counts if the water is contained by the assembly you meant to inspect.
How do you build a temporary clay dam at the threshold?
You build the temporary clay dam by sealing the full opening, pressing it to the floor, and checking the ends for gaps before water goes in. The dam has to be continuous from wall to wall, or the test will leak at the weakest point.
If you are looking at a flush entry where the shower floor meets the room floor with no rise, a good temporary dam sits low, bonds to the surface, and follows the shape of the opening without forcing water under the edge.
Use this order:
- Clean the threshold with a dry cloth so dust does not break the seal.
- Shape the clay dam into a long, even strip that spans the opening.
- Press the dam firmly to the floor so both ends meet the sidewalls or jambs.
- Feather the edge toward the wet side so water pressure helps hold it in place.
- Check the corners for pinholes, skips, or folds before you add water.
A temporary clay dam works best when the floor is flat and the opening is straight. On a threshold with tile lippage, a drain slope change, or a rough edge, the clay needs more attention because tiny voids become leaks once the water reaches them.
Do not stack a loose mound and call it good. That often fails where the material lifts at the ends. The result is a slow seep that wastes time, stains the floor, and makes you chase a failure that came from the dam, not the pan.
You can inspect the dam dry, fix the low spots, and then start the fill. That saves you from a second round of cleanup.
How to flood test a curbless shower pan step by step
You flood test a curbless shower pan by sealing the drain, sealing the threshold, filling to the required level, and watching the water line for the inspection hold time. The action is simple; the discipline is in the setup and the wait.
If the drain is plugged, the temporary clay dam is in place, and you are about to add water to a floor that has no curb to save you, every step has one job. Rushing any one of them can force a retest.
- Insert the pneumatic test plug into the drain and inflate or tighten it until it seats firmly.
- Mark the water level indicator on the wall or on a taped gauge where the inspector can see it clearly.
- Place the temporary clay dam across the threshold and seal the ends against the sidewalls.
- Fill the pan slowly with water until it reaches the inspection depth your local code or inspector requires.
- Wait with the water level indicator untouched for the required hold time, watching for any drop.
- Inspect the perimeter for seepage at the threshold, corners, and drain edge while the water sits.
- Drain the pan only after the reading is complete and the result is documented.
A water level indicator matters because your eye guesses wrong over a long hold. Even a small drop can be hard to spot without a fixed line. Painter’s tape works if it is straight and visible. A pencil line on tile works too, as long as the inspector can see it.
The fill has to be slow. Fast water can push a weak dam out of shape, trap air at the drain, or splash over a low corner. Slow filling also gives you time to check for drips under the threshold, which is where a curbless detail usually reveals its problems.
The test is less about volume than about containment. If the pan holds a steady line and the threshold stays dry, the assembly is behaving the way a plumbing code inspection expects it to behave.
What fails a plumbing inspection flood test on a curbless shower?
A plumbing inspection flood test usually fails because the drain plug leaks, the temporary dam opens at the ends, or the water line drops during the hold. Those are the common failures, and each one has a different fix.
If the pan looked tight at first, but by the end of the hold time there is a wet trail at the threshold or a lower water line than the mark, that is not a mystery. It is one of a few predictable faults.
Common mistakes and what they cost:
- Loose pneumatic test plug: water escapes through the drain body. Cost: a false fail and a wasted test. Fix: reset the plug and check the seal before filling.
- Short dam at the ends: water sneaks around the sides. Cost: hidden seepage that looks like a membrane leak. Fix: extend the clay to the walls and press the ends tight.
- Uneven threshold surface: the dam bridges over low spots. Cost: water finds the gap under pressure. Fix: reshape the dam and fill voids in the surface first.
- No clear water level indicator: the inspector cannot verify the line. Cost: a retest or a dispute over the result. Fix: add a clean mark at eye level.
- Filling too fast: the dam shifts or folds. Cost: a setup failure before the actual test begins. Fix: add water in a controlled stream.
A curbless shower water test also gets tripped up by floor slope that runs the wrong way at the opening. That is not fixed by a better dam. If the floor pitches outward, the test may show the real problem: the water wants to leave the wet area.
A good-looking threshold can still fail if the drain seal is bad. If the water line drops and the threshold stays dry, the leak may be under the plug, not in the waterproofing.
How long must a shower flood test sit?
A shower flood test must sit for the time required by the local plumbing code or the inspector on site, and that time is often treated as a set hold period for the inspection. The exact duration is not something to guess at from the floor alone.
If the pan is filled, the line is marked, and now the only job is waiting, that is where many people get impatient and drain early. That can ruin a valid test even when the assembly was holding.
Use the hold time the inspector specifies. If the job is under a local plumbing code inspection, that person’s requirement controls the test on that site. If the spec references TCNA guidelines, keep those documents handy so the test method matches the intended assembly detail.
During the hold:
- Leave the water line undisturbed.
- Watch for seepage at the threshold ends.
- Check the floor below if the construction allows access.
- Photograph the line if documentation is part of the job.
Do not top off the pan unless the inspector tells you to. A quick refill can hide a slow leak and make the reading meaningless. If the level drops before the hold is complete, the test has not passed yet, and the source of the loss still needs to be found.
The result should be boring: the line stays put, the dam stays intact, and the inspector sees a dry perimeter. That is the pass.
Which details matter most to pass the test the first time?
The details that matter most are the drain seal, the threshold seal, and the water line mark. If those three are right, the rest of the test is mostly patience.
If the pan is built, but one tiny gap at the threshold or one weak seal at the drain can turn the whole inspection into a retest, the job rewards clean setup far more than clever repair.
Keep these checks in mind:
- Make sure the pneumatic test plug is the right size for the drain body.
- Keep the temporary clay dam continuous, with no breaks at the ends.
- Use a clear water level indicator that will not smear when damp.
- Follow the inspection method named by the plumbing code inspection.
- Match the assembly to TCNA guidelines if that detail is part of the project documents.
A curbless shower pan is less forgiving than a curb-backed pan because the threshold has no height to hide mistakes. That makes the flood test the chance to catch a bad edge before finish work closes the access.
If the dam, plug, and reading line are all done right, the test tells you something useful. If any one of them is sloppy, the result is noise.
What should you do after the test passes or fails?
You should document the result, remove the temporary materials carefully, and fix the leak source before the finish work moves ahead. A pass closes the inspection step; a fail tells you exactly where to look next.
If the water has sat long enough, the line has stayed steady, and now you need to clean up without damaging the floor, remove the temporary dam first, then the drain plug, then the remaining water.
After a pass:
- Photograph the final water line.
- Remove the clay dam without scraping the surface.
- Deflate and remove the pneumatic test plug.
- Dry the threshold and corners.
- Keep the inspection note with the job records.
After a fail:
- Recheck the drain plug seating.
- Inspect the threshold ends for breaks.
- Look for low spots under the dam.
- Reset the setup and repeat the flood test only after the cause is fixed.
A failed test is not a reason to guess. It is a reason to isolate the leak and run the same test again, cleanly. That is the difference between a real result and a story about what might have happened.
FAQs
How do you flood test a shower without a curb?
You seal the drain with a pneumatic test plug, build a temporary clay dam across the opening, fill the pan to the required level, and watch a marked water line during the hold period. The threshold seal has to be tight wall to wall, or water can escape at the ends and give you a false fail.
How long must a shower flood test sit?
It must sit for the hold time required by the local plumbing code or the inspector on site. That time is set by the inspection requirement, not by guesswork from the floor alone. If the level drops before the hold is complete, the test is not a pass yet and the source of loss still needs to be found.
Drafted with AI; not yet reviewed by a person.

2 thoughts on “How to flood test a curbless shower pan”